5 Common Problems in PCBA Manual Soldering
5 Common Problems in PCBA Manual Soldering
Manual soldering(hand soldering) is inevitable the first step for an electronics maker’s skills, although there are plenty of soldering houses that can be helpful even for 1 pcs PCBA prototyping board, but still, manual soldering would be also necessary for hardware debugging. It is easy for a Chinese factory worker, but sometimes it could be a nightmare for a Stanford University professor.
Hand soldering could be a "cheap" skill, but without it, you may be crazy when you want to change a resistor in your hardware debugging.
Of course, it is important to know what a good solder joint should be, and what’s a bad joint in PCBA manual weld?
Hand soldering could be a "cheap" skill, but without it, you may be crazy when you want to change a resistor in your hardware debugging.
Of course, it is important to know what a good solder joint should be, and what’s a bad joint in PCBA manual weld?
1. What's a good solder joint?
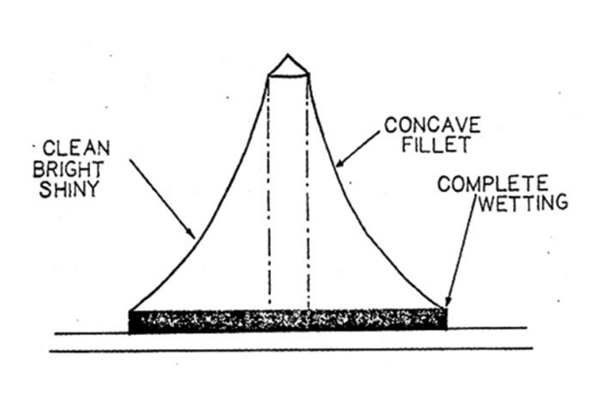
1.1 Good SMD Joints:
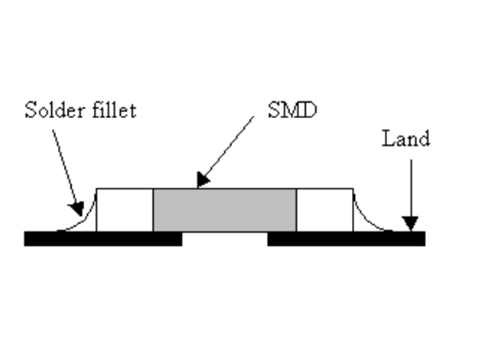

A good SMD Joint needs to be:
- Good and complete wetting
- Concave fillet
- Shiny and Clean
1.2 Good THT Joints:

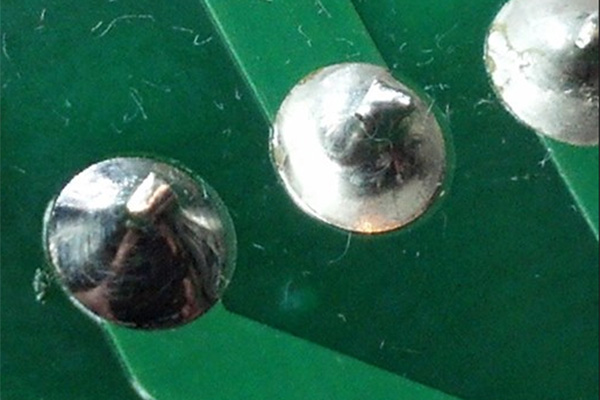
For good THT soldering, it needs to be :
- Smooth and shiny concave surface at an angle of 40 to 70 degrees
- The Tins contacts the pads and pins best
2. What's bad soldering?
There could be many factors that make bad soldering:
2.1 Soldering Bridge

A soldering bridge is that 2 pins are connected by fault, it is the most common problem for manual soldering, especially for SMD. It causes the circuit short, or even burns the whole board when the power circuit shorted.
The solution:
-
In design, use proper THT connectors. Usually, the THT connectors are at least 1.27mm which should be safe. But for some USB type-c connector, the THT pads interval very small... Think about if you can solder them in the design.
-
In PCB production, ask your PCB factory to add a solder mask bridge between pins, which could help to avoid the soldering bridges.
-
Check the small pads carefully before powering your boards, and use a magnifier if you do not think your eyes trustable.
-
Er, the most important, practice your hand soldering skills

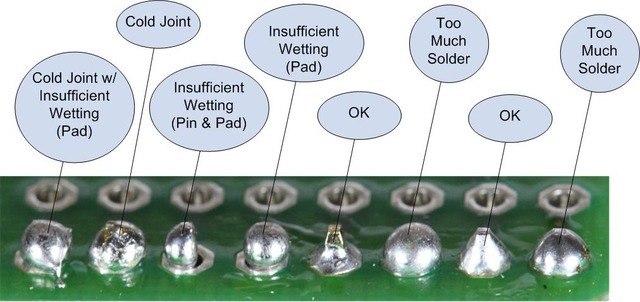
2.2 Cold Joint
Cold joints mean that the joints solder do not melt as intended, from the appearance, the joint is surrounded by solder, but the solder surface is rough or lumpy:
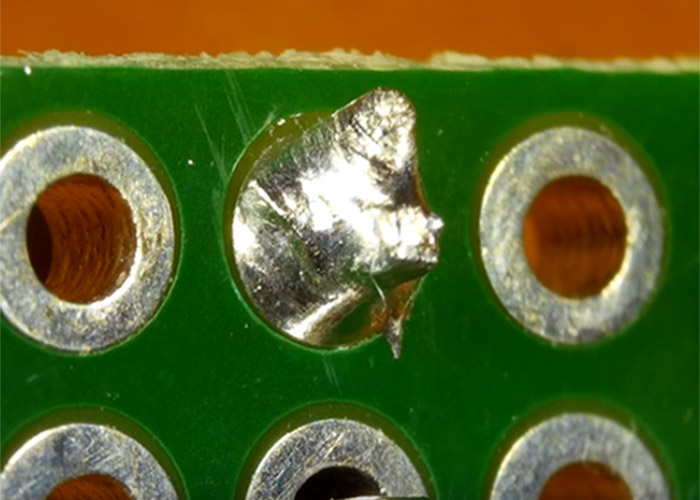 The cold joint reason maybe the soldering temperature/time not enough, or the wire/ pads bigger, that it dissipates the heat quicker. In manual soldering, to avoid& repair cold joint, make the soldering time longer, or make the iron temperature higher, to make the solder meld absolutely…


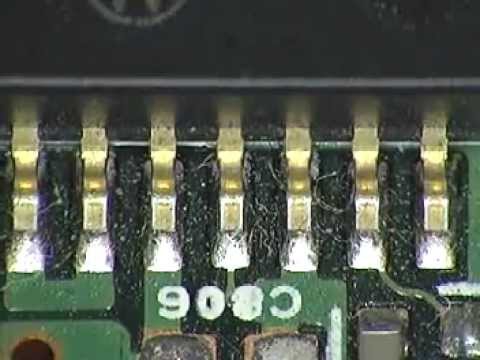
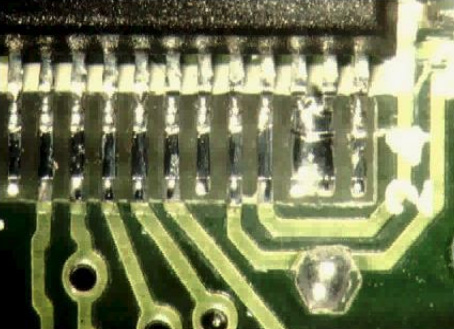
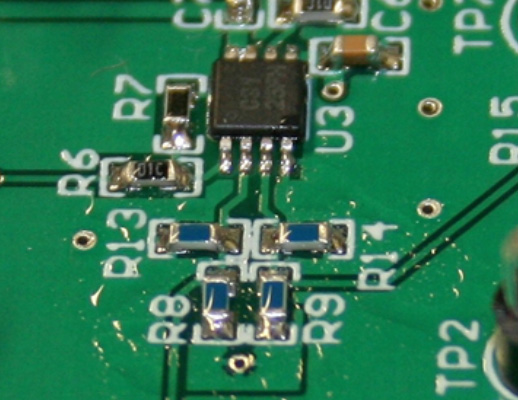
2.3 Insufficient Wetting
Even the heat OK, but how if the heat does not get to the right place? That is called “Insufficient Wetting”:
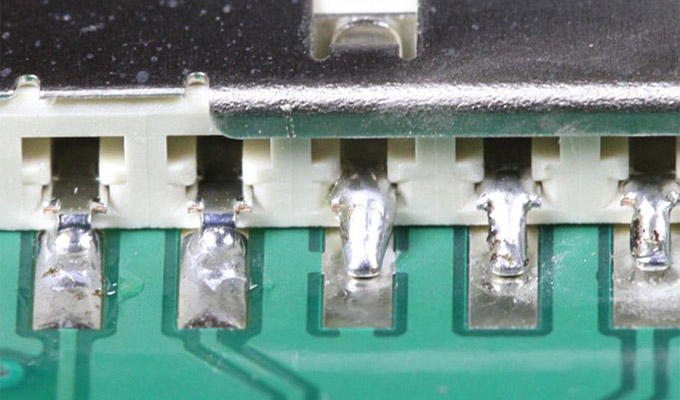
The three pins of a surface mount component where the solder has not flowed onto the solder pad. This is caused by heating the pin instead of the pad.
The solder is intended to be at the joint of pins& pads, but in the above picture, the solder goes on the pins, and has not wetted the pin at all, or has only partially wetted the pad. The connection between the pins to the pads would be weak.
To avoid this problem or for repairing, try your best to heat the joint at the pads and pins but not only pins, or pads. To repair this problem, re-heat the solder pad with the tip of the iron, then applying the solder until it flows and melts together with the solder already on the pin.
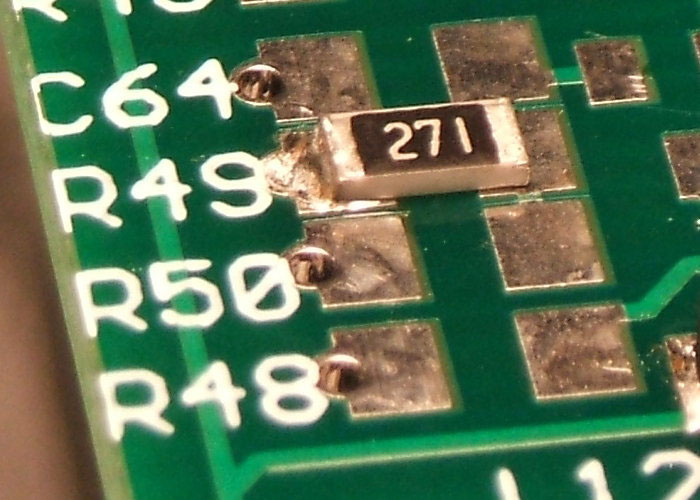
2.4 Solder Starved
A starved joint simply does not have enough solder. As the below picture, for a safe connection, there should be enough solder sink into the THT holes, to make a full connection. The reason is insufficient heat was applied to the lead or not enough solder.
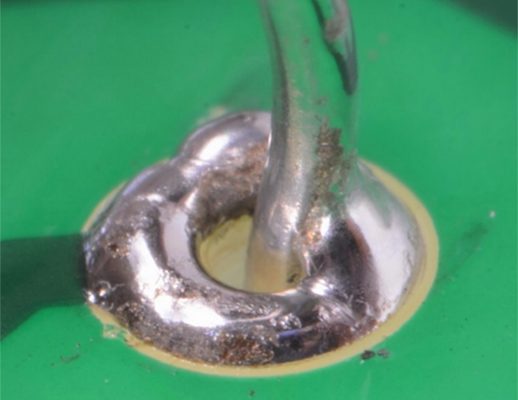
Reheat the joint and add more solder to make the solder flow into the THT holes.
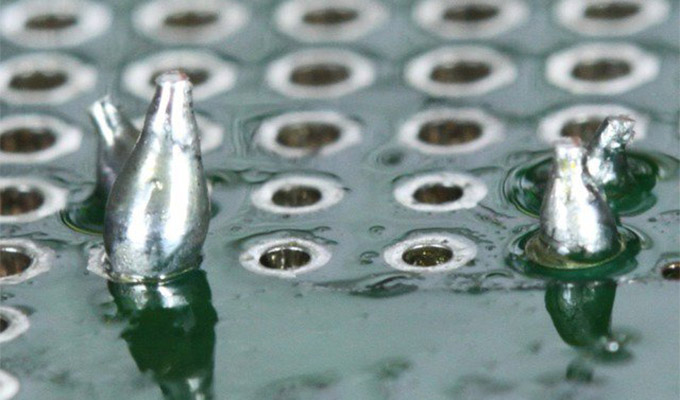
2.5 Solder Splashes/ Webbing
These bits of solder are held to the board only by sticky flux residue. These irregularly shaped threads are caused by insufficient use of a fluxing agent or the existence of pollutants on the surface of the boards during wave soldering, if they work loos off from the board, they can easily cause a short circuit on the board.
A used toothbrush could be a good tool to clear these splashes. Yes, brush the board surface hard. Do not worry if the hard brushing damages the components or make them fall off, if they did fall, it only means they are not well soldered. You may also need to use your on-hand tweezers to clean some of them.
At the last, the final solution for all the manual soldering problems is PRACTICE MORE. Makerfabs DIY ESP Smartwatch Kit is a kit that not only for hand soldering practice, but also the IoT programming, and finally a daily tool for weather forecasting. Detailed manually soldering video could be helpful for you to complete your first soldering task.
At the last, the final solution for all the manual soldering problems is PRACTICE MORE. Makerfabs DIY ESP Smartwatch Kit is a kit that not only for hand soldering practice, but also the IoT programming, and finally a daily tool for weather forecasting. Detailed manually soldering video could be helpful for you to complete your first soldering task.