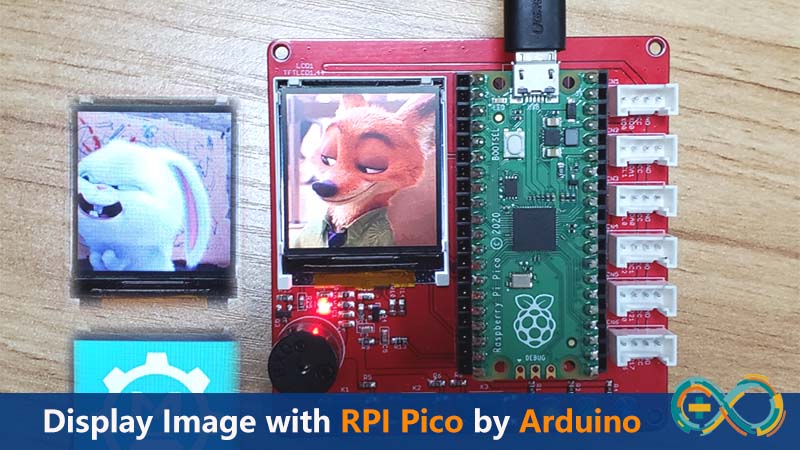
Display Image with Raspberry Pi Pico by Arduino
Many people are familiar with Raspberry Pi Pico now, but some people are still very unfamiliar with Pico programming using Arduino. This is a tutorial about Display Image with Raspberry Pi Pico by Arduino Programming, with detail guide about how to program Pico with Arduino and display some pictures on the 1.44inch LCD.
1. Prepare Hardware
● 1.44" LCD Display● Raspberry Pi Pico
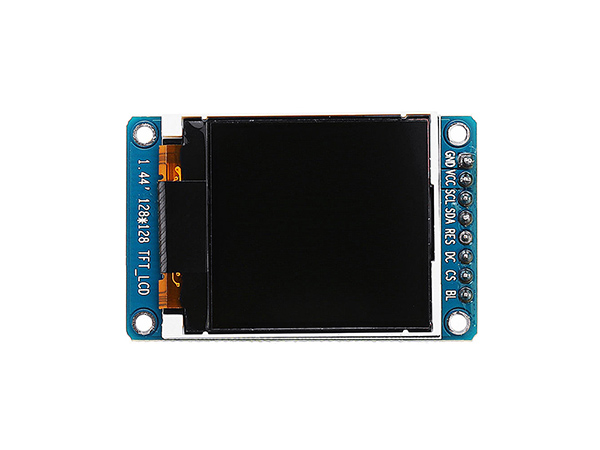
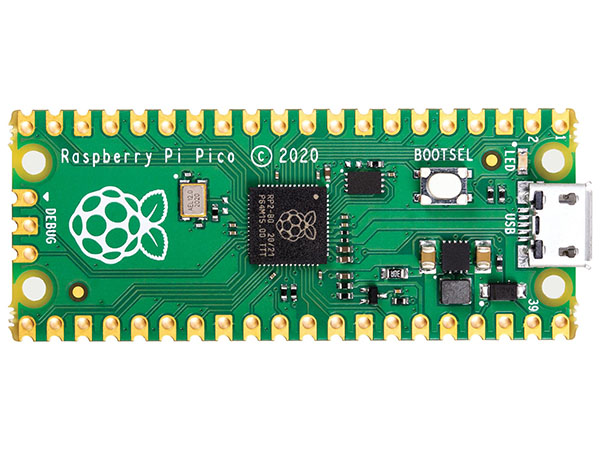
First, prepared the important roles of this project: Raspberry Pi Pico and 1.44 inch LCD. Instead preparing the display that I had to connect with Pico by many jump lines, I used a Pico kit board which feature a 1.44 inch LCD, it was convenient and save a lot of time that might had been wasted connecting the screen to the Pico.

The Pico kit board is designed for using Pico conveniently, not only integrated the display, but also provide three keys as GPIO input, three LEDs and one buzzer as the GPIO output. In addition to, for expansion to plug kinds of sensor module, it also provides many interfaces supported UART, I2C, ADC and GPIO. All the pins of the Pico have been available by the 2.54mm interface.
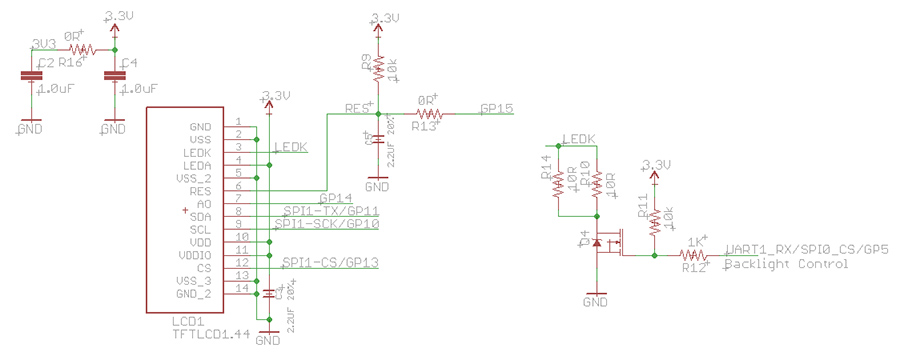
Focus on the 1.44 inch LCD, the schematic is shown as the picture. The LCD is controlled by the ST7735 driver, and it connect with the Pico by SPI way. The detail of the connection as the below:
LCD ------ Pico
MOSI ------ GPIO 11
SCK ------ GPIO 10
CS ------ GPIO 13
DC ------ GPIO 14
RES ------ GPIO 15
Refer it, I could config it in the software easily.
2. Prepare Image
Common images are JPG format or PNG format with difference size. 1.44 inch LCD have 128*128 pixels so that it requires to cut or compress the image to 128*128. convert images into the formats required for UTFT libraries for Arduino with an image converter tool. The converter tool link is: http://www.rinkydinkelectronics.com/t_imageconverter565.php3. Use Pico with Arduino First Time
The version of Arduino IDE in this project is V1.8.10, and all the steps I done were base on it.When you use Arduino uploading to Pico first time, follow the steps to start:
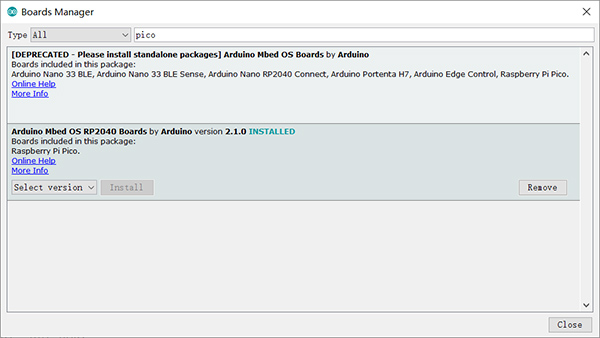
1. Install the development library of Pico, open Arduino IDE, and click "Tools->Board->Boards Manager"; search the "Pico" and install the library "Arduino Mbed OS RP2040 Boards". The library installation is completed.
2. Press the BOOTSEL bottom on the Pico board, then plug it to the PC with the USB cable.
3. Choose the correct port
4. Upload the code which is empty.
The firmware of Arduino for Pico will be loaded to your Pico board, and you can use your PICO as the normal ARDUINO BOARD. If you want to program Pico with MicroPython, you have to load the MicroPython firmware to it again.
4. Coding
First install the library that support the ST7735 display, and I installed the Adafruit one.Program Pico as the Arduino, and it is notice that the SPI Initialize is different.
SPI = MbedSPI(SPI_MISO, SPI_MOSI, SPI_SCK);You can get the code from Github.
#include <Adafruit_GFX.h>    // Core graphics library
#include <Adafruit_ST7735.h> // Hardware-specific library for ST7735
#include <SPI.h>

#include "a1.h"
#include "pic1.h"
#include "pic2.h"

#define TFT_CS 13
#define TFT_RST 15 // Or set to -1 and connect to Arduino RESET pin
#define TFT_DC 14

#define SPI_MOSI 11
#define SPI_MISO 12
#define SPI_SCK 10

Adafruit_ST7735 tft = Adafruit_ST7735(TFT_CS, TFT_DC, TFT_RST);

void setup(void)
{
    Serial.begin(115200);
    Serial.print(F("Hello! ST77xx TFT Test"));

    SPI = MbedSPI(SPI_MISO, SPI_MOSI, SPI_SCK);

    // OR use this initializer (uncomment) if using a 1.44" TFT:
    tft.initR(INITR_144GREENTAB); // Init ST7735R chip, green tab

    Serial.println(F("Initialized"));

    tft.fillScreen(ST77XX_BLACK);
}

void loop()
{
    //Show logo
    tft.drawRGBBitmap(0, 0, a1, 128, 128);
    delay(3000);
    tft.drawRGBBitmap(0, 0, pic1, 128, 128);
    delay(3000);
    tft.drawRGBBitmap(0, 0, pic2, 128, 128);
    delay(3000);
}
5. Show - Display Images with Pico
If you have further questions for this tutorial about Display Image with Raspberry Pi Pico by Arduino Programming, or need some customized PCBA service, pls contact service@makerfabs.com.