
MicroPython ESP32 Tutorial - Getting Started
1. Overview: Getting Started with MicroPython on ESP32 using uPyCraft IDE
In this MicroPython ESP32 Tutorial - getting started with MakePython ESP32, we will learn how to use MicroPython on ESP32 using uPyCraft IDE. We all are familiar with the Python Programming Language. Python is an interpreted, high-level, general-purpose programming language. As Python is a very powerful language it is used for Artificial Intelligence (AI) & Internet of Things Applications.
As Python became very popular, the Python community developed MicroPython. MicroPython is a lean and efficient implementation of the Python programming language that includes a small subset of the& Python standard library and is optimized to run on microcontrollers and in constrained environments. Micropython is supported by boards like PyBoard, ESP8266, ESP32 & other boards.
In this tutorial, we will be using MicroPython on ESP32 Board using uPyCraft IDE. uPyCraft is an IDE that works with Windows and Mac and designed with a simple interface which is convenient to use. uPyCraft is developed by DFRobot.
We will take two examples here as a reference to learn MicroPython on ESP32 using uPyCraft IDE.
1. We will first write code to blink an LED which is simply like writing the “Hello World” Program.
2. In the second example, we will make a Web Server to control an LED using Web Page.
2. What is MicroPython?
MicroPython is a software implementation of a programming language largely compatible with Python 3, written in C, that is optimized to run on a microcontroller. The difference between Python & MicroPython is that MicroPython does not come with the full library support as Python. Therefore MicroPython works in constraint conditions only. There are few standard libraries to access and interact with the low-level hardware like GPIOs, Wi-Fi, Networking.
MicroPython is a full Python compiler and runtime that runs on the microcontroller hardware. The user is presented with an interactive prompt (the REPL) to execute supported commands immediately. Included are a selection of core Python libraries; MicroPython includes modules that give the programmer access to low-level hardware.
3. MakePython ESP32 Board
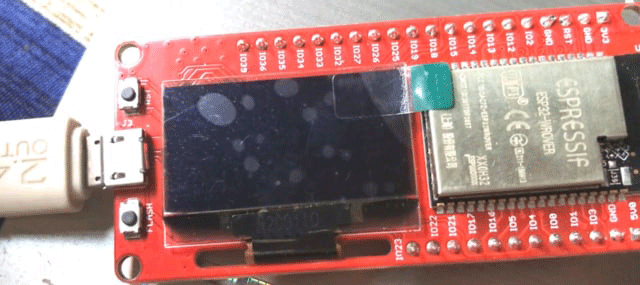
As already explained above, we will first need an ESP32 Board. So I purchased an ESP32 Board specially designed for using Micropython from MakePython ESP32 Board from MakerFabs.
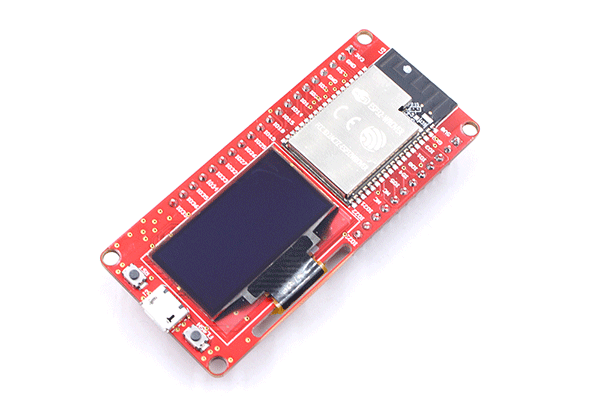
MakePython ESP32 Board has the same ESP32 Chip from espressif. The advantage of this board over the normal ESP32 Board is that, the board has an additional 0.96″ OLED Display added to it.
MakePython ESP32 is a powerful, generic Wifi+ BLE MCU module target to MicroPython learners & developers. It is true “breadboard compatible”, with the very detailed pins explanation, it is easy to learn & use. The MakePython ESP32 is programmed with MicroPython by default, users can begin the MicroPython developing as getting then on hand.

The complete pin description and detail about this board can be found here: MakePython ESP32 Description. You can even purchase the board from the same link.
4. Getting Started with MicroPython on ESP32 using uPyCraft IDE
The section covers:
1. Installing Python 3.8.x on Windows/MAC
2. Installing uPyCraft IDE
3. Flashing the MicroPython Firmware (Bin File) on MakePython ESP32 Board
4. Writing Python Code and uploading the code on ESP32 using uPyCraft IDE
5. Blinking of LED
6. Controlling the LED using Web Server
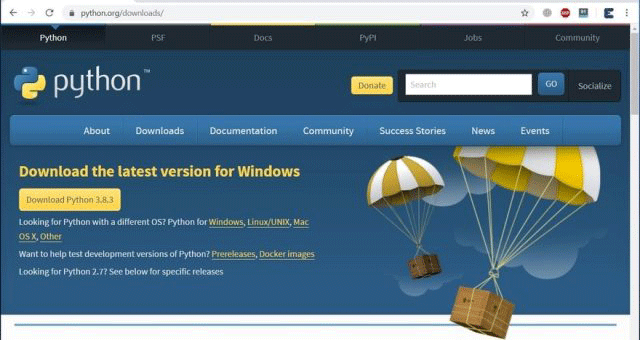
Step 1: Installing Python 3.8.x on Windows
MicroPython is an implementation of Python so we first need to install Python 3.8.x or above. To install Python 3.8.x download Python from https://www.python.org/downloads/
After downloading Python 3.8.x, you need to install it.
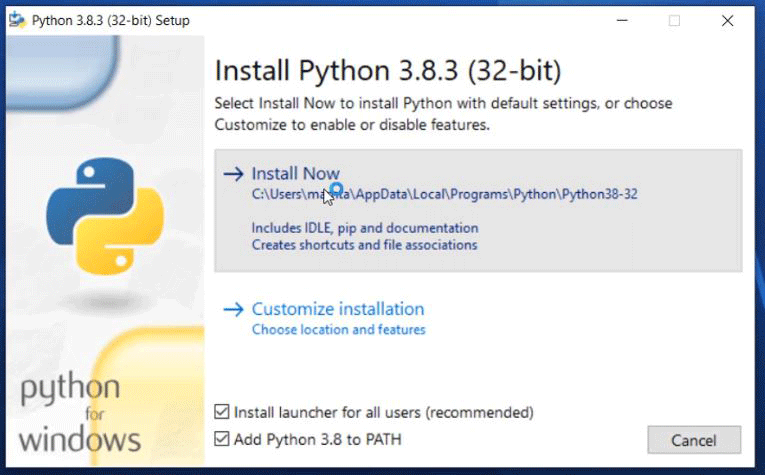
Once the installation is completed, you can close the installation window.
Step 2. Installing uPyCraft IDE
There are only a few IDEs that support MicroPython like Thonny IDE and uPyCraft IDE. Thonny IDE does not have an option to flash MicroPython firmware on ESP32 but the uPyCraft IDE has inbuilt functionality to flash firmware, programming, and uploading the code in ESP32 board.
Go to this link: uPyCraft IDE Download & download the uPyCraft IDE.
After downloading, you can simply click the .exe and the following window will open.
Now Let’s have a closer look at the uPyCraft IDE and its 4 sections. All 4 sections have their own importance.
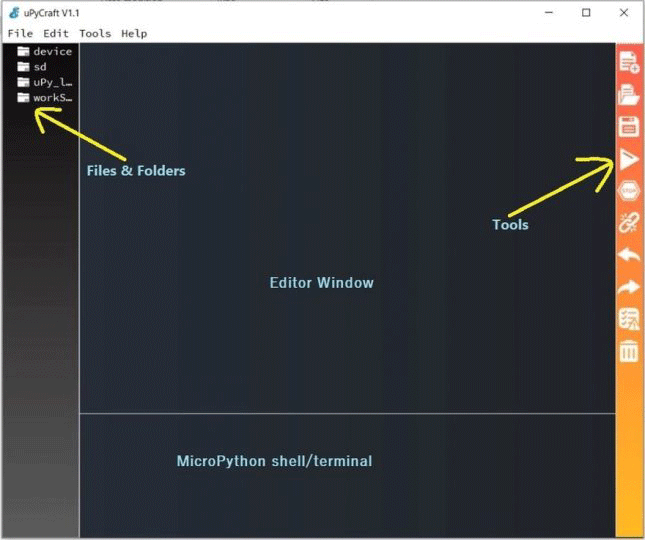
1. Folders and files:
This section contains files and folders like Device, SD Folder, uPy_Lib & Workspace. The device folder contains the files stored in the ESP board including boot.py or main.py. SD folder contains the files stored in the SD card. uPy_lib contains in-built MicroPython IDE libraries. The workspace contains the files that will be saved on your PC.
2. Editor Window:
This section is for writing and editing the python code. Multiple python files can be opened in Editor.
3. Tools:
This section contains options for creating a new file, saving the file, uploading the file, connecting/disconnecting the board, clearing shell.
4. MicroPython Shell/Terminal:
This section is for writing and executing the shell commands on the ESP board. This section also shows the status of the program, errors & print messages.
Step 3: Flashing the MicroPython Firmware (Bin File) on MakePython ESP32 Board
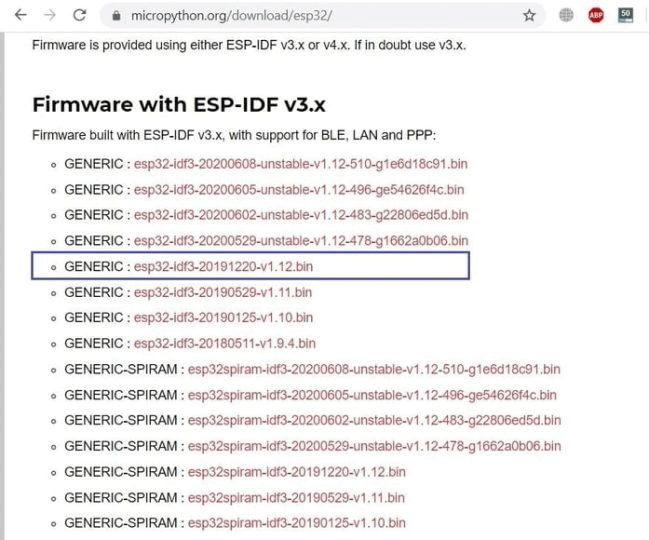
Now we need to flash firmware to ESP32 Board so that it can support MicroPython. Visit this link: https://micropython.org/download/esp32/ and download the .bin file as shown in the image below. Choose the stable version.
After downloading the firmware, we need to upload it to ESP32 Board using uPyCraft IDE. So first connect the ESP32 Board to your PC using Micro-USB Data Cable.
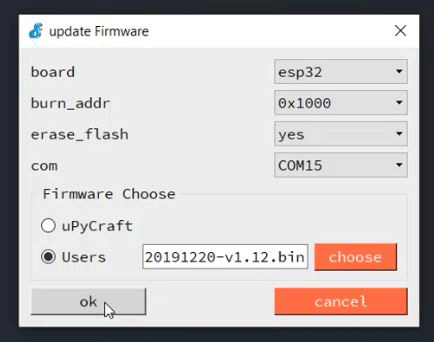
Now open the uPyCraft IDE and Select Tools → Burn Firmware.
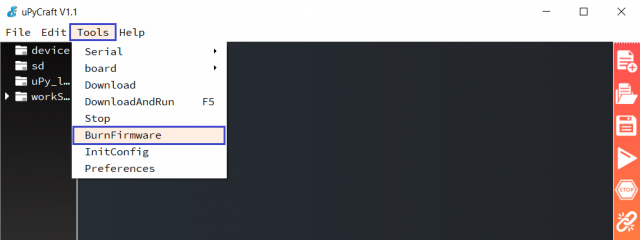
Choose the following options shown in the image below. Select the bin file that you downloaded recently (explained above). And then click on OK.
So the firmware will start uploading. In some ESP32 boards, you need to press the boot button to get the process started.
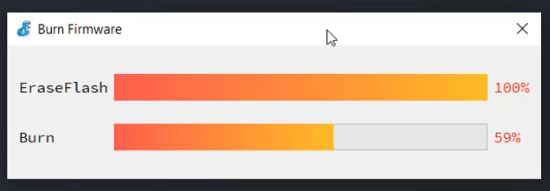
Once the uploading is done, the window will close automatically.
Step 4. Writing Python Code and uploading the code on ESP32 using uPyCraft IDE
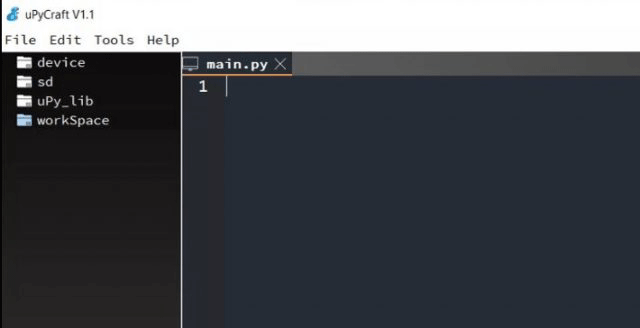
1. Now click on File and create a new file with name main.py or give it any other name.
2. Then, go to Tools → boards. Choose your board as ESP32.
3. Again go to tools → Serial and choose your COM port.
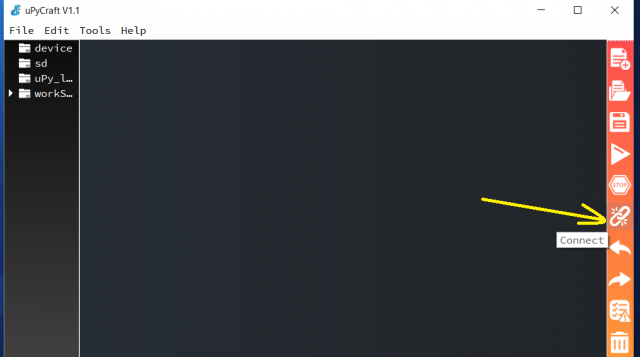
4. Now, click on the connect icon in the Tools section to make the connection between IDE and ESP32 board.
5. ESP32 LED Blinking with MicroPython using uPyCraft
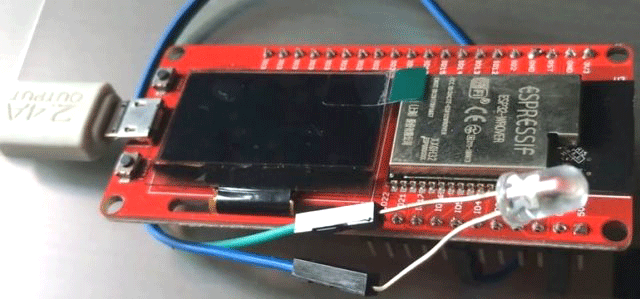
Now let us do the first getting started the program. For that connect the LED to GPIO5 Pin of MakePython ESP32 Board.
Copy the following MicroPython Code and upload it to the ESP32 Board by clicking on the download button.

import time
from machine import Pin
led=Pin(5,Pin.OUT)          #create LED object from pin5,Set Pin5 to output

while True:
  led.value(1)              #turn off
  time.sleep(0.5)
  led.value(0)              #turn on
  time.sleep(0.5)
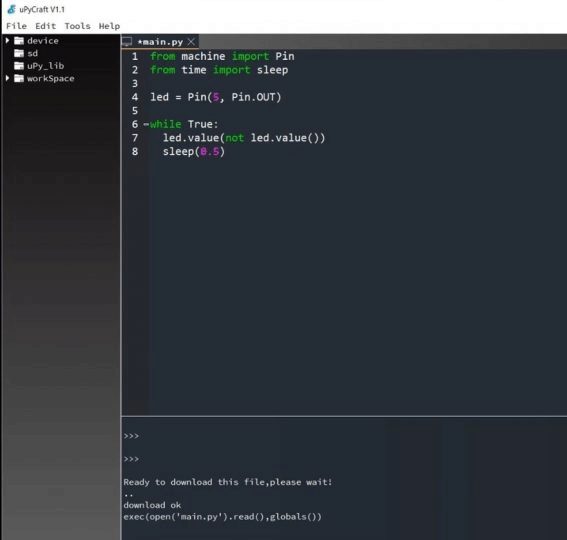
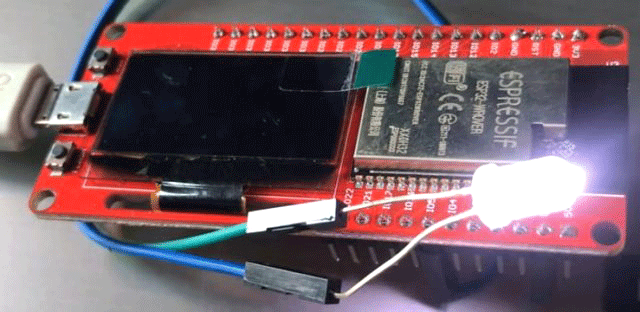
As soon as you hit the download button, you can view the details in ;Python shell as shown in the above image. Similarly, the connected LED will start blinking.
6. ESP32 Micropython: Controlling LED using Web Server
Now let us design a small webpage and control the turning ON & OFF of LED using Web Server. You can follow ESP32 Web Server Tutorial if you want to learn more about the Web Server.
Copy the following MicroPython Code and upload it to the ESP32 Board by clicking on the download button again. In the below code change the credentials for wifi SSID & Password.
import network
import webrepl
import time
from machine import Pin
try:
import usocket as socket
except:
import socket
AUTH_OPEN = 0
AUTH_WEP = 1
AUTH_WPA_PSK = 2
AUTH_WPA2_PSK = 3
AUTH_WPA_WPA2_PSK = 4
SSID = "************" #Modify here with SSID
PASSWORD = "*************" #Modify here with PWD
led = Pin(5, Pin.OUT)
def web_page():
html = """<html><head><meta name="viewport" content="width=device-width, initial-scale=1"></head>
<body><h1>ESP32 Web Server</h1><a href=\"?led=on\"><button>OFF</button></a>
<a href=\"?led=off\"><button>ON</button></a></body></html>"""
return html
def do_connect(ssid,psw):
#import network
#import time
wlan = network.WLAN(network.STA_IF)
wlan.active(True)
s = wlan.config("mac")
mac = ('%02x:%02x:%02x:%02x:%02x:%02x').upper() %(s[0],s[1],s[2],s[3],s[4],s[5])
print("Local MAC:"+mac) #get mac
wlan.connect(ssid, psw)
if not wlan.isconnected():
print('connecting to network...' + ssid)
wlan.connect(ssid, psw)
start = time.ticks_ms() # get millisecond counter
while not wlan.isconnected():
time.sleep(1) # sleep for 1 second
if time.ticks_ms()-start > 20000:
print("connect timeout!")
break
if wlan.isconnected():
print('network config:', wlan.ifconfig())
return wlan
def connect():
do_connect(SSID,PASSWORD)
def app():
connect()
s = socket.socket(socket.AF_INET, socket.SOCK_STREAM)
s.bind(('', 80))
s.listen(5)
while True:
conn, addr = s.accept()
print('Got a connection from %s' % str(addr))
request = conn.recv(1024)
request = str(request)
print('Content = %s' % request)
led_on = request.find('/?led=on')
led_off = request.find('/?led=off')
if led_on == 6:
print('LED ON')
led.value(0)
if led_off == 6:
print('LED OFF')
led.value(1)
response = web_page()
conn.send('HTTP/1.1 200 OK\n')
conn.send('Content-Type: text/html\n')
conn.send('Connection: close\n\n')
conn.sendall(response)
conn.close()
app()
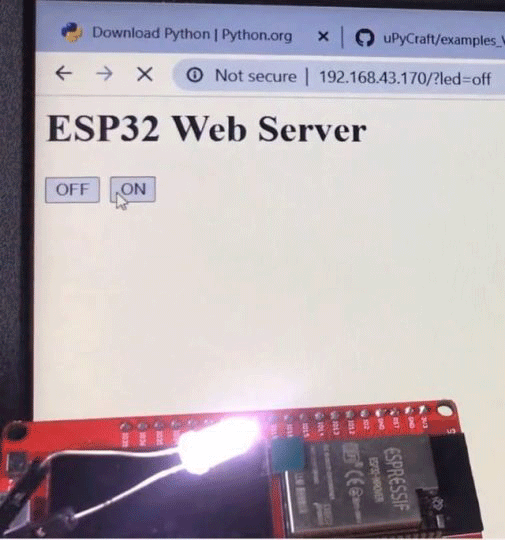
After code is successfully downloaded, you can see the ESP32 Board connecting to the network in the uPyCraft Shell. Similarly the IP Address of the Board will also be displayed. Copy the IP Address and paste it on any web browser. So the page will open as shown below.
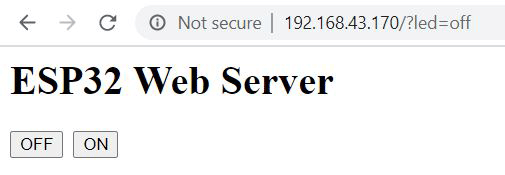
You can now send ON Command or OFF Command to Turn ON or Turn OFF the LED respectively.
This article is originally published on how2electronics.