Raspberry Pi Basic Usage with DHT11
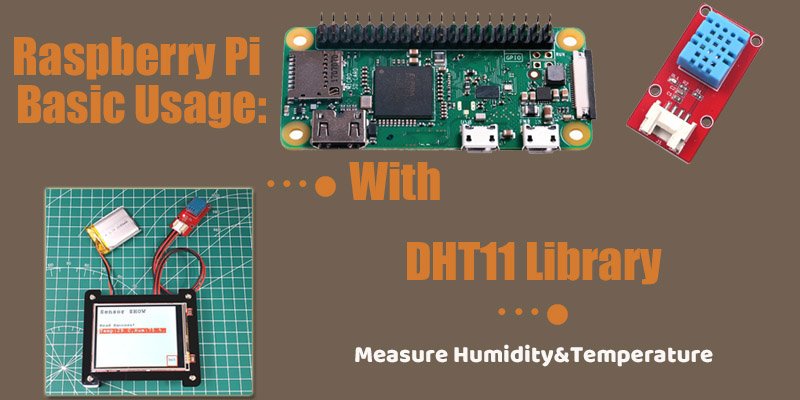
This article will show you the Raspberry Pi Basic Usage with DHT11 library, using the Raspberry Pi Zero and Mabee DHT11 Module to measure the humidity and temperature.
Raspberry Pi is a low-cost, credit-card-sized computer. It is a capable little device that can implement interesting projects of your mind. I plan to use it as a hardware development for my projects. Now I will show you the basic usage of the DHT11 and Raspberry Pi.
1. DHT11 Sensor
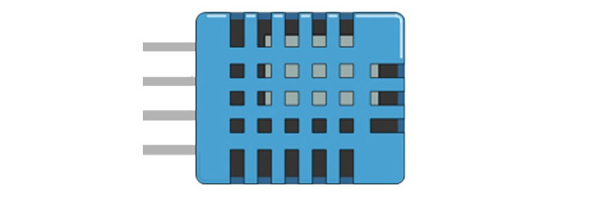
DHT11 is a basic, low-cost digital temperature and humidity sensor. It is often used in some electronic projects. Compared to other temperature sensors, they spent low-cost and using easily. Although it measuring with not high accuracy, it is popular to use in projects. DHT11 is good for 5~95% humidity readings with 5% accuracy and -20~60°C temperature readings with +-2°C accuracy.
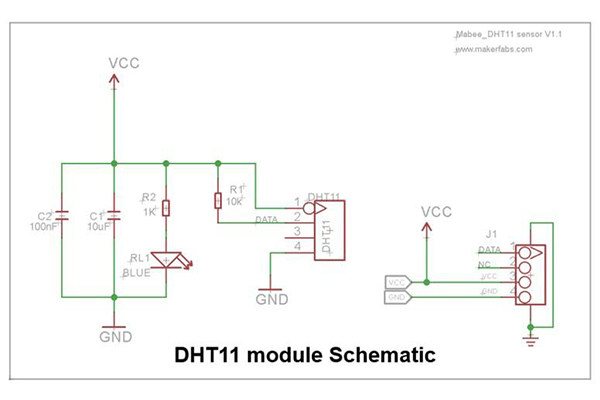
DHT11 module has four-pin, which three one used for VCC, GND and DATA, and the last one is no connected. It uses the one-wire protocol to transfer data that all the sensor readings are sent using a single bus. The one-wire bus is a device communications bus that controller and device communicating with one wire. The data change and control are completed through this single line. Besides, it would reduce the cost of the wire and the use of the GPIO.
The DHT11 sensors usually require an external pull-up resistor of 10KΩ (R1) between VCC and Out pin for proper communication. When the bus is idle, the voltage status is High.
2. Mabee_Temperature& Humidity DHT11 Module
Mabee_Temperature& Humidity DHT11 is high quality, low-cost digital temperature, and humidity sensor based on the DHT11 module, which is the most commonly used sensor for temperature& Humidity, it is widely favored by hardware enthusiasts for its advantages such as low power consumption and excellent long-term stability.
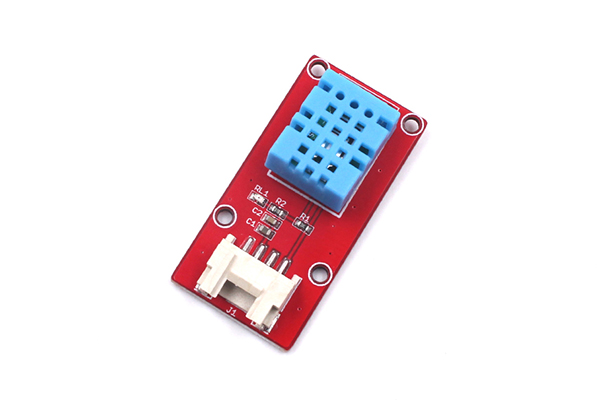
Makerfabs Mabee series are modules with unified connectors, both sensors and actuators, for users to use them conveniently by plug& play, without any soldering or detailed checking of the sensor itself. Makerfabs provide basic usage demos, for the starters to learn the usage and integrate to other projects quickly.
All Makerfabs Mabee are open, both hardware& software, and compatible with Seeed Groves.
Features& Specs:
● Power: DC3.3V
● Humidity Range& Accuracy:5%~95%, with +/- 5%
● Temperature range: -20~60 degree, with +/- 2%
● Power: DC3.3V
● Humidity Range& Accuracy:5%~95%, with +/- 5%
● Temperature range: -20~60 degree, with +/- 2%
3. Raspberry PI
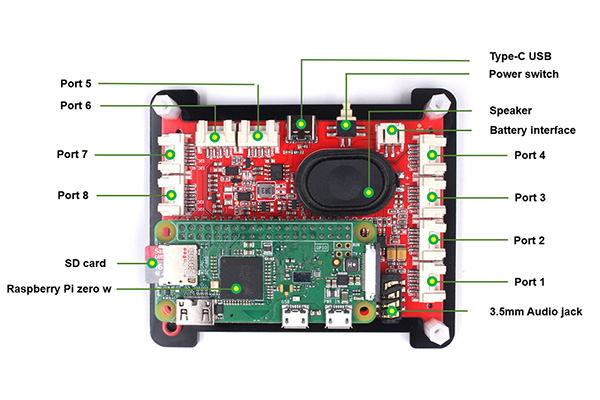
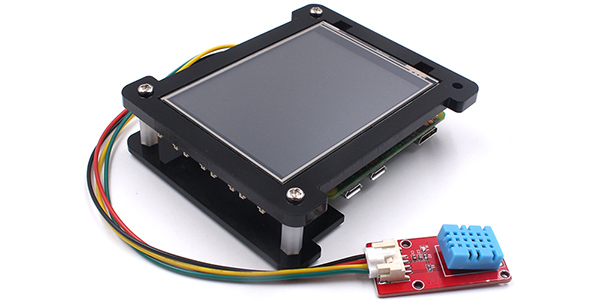
Raspberry pi has a strong ability for computing. For suitable and low-cost, Raspberry pi Zero W is the best choice for a hardware project, which has enough calculating and smaller size. I used the PI hat designed by Makerfabs that based on Raspberry Pi Zero W to develop. This Pi hat has a 3.2 inch SPI display with touch for display something. It also provides many kinds of ports, such as UART, I2C, ADC, GPIO, that are very suitable for the embedded projects to expand. Besides, it has a speaker for the audio output. I can connect the DHT11 module with it by the cable easily.
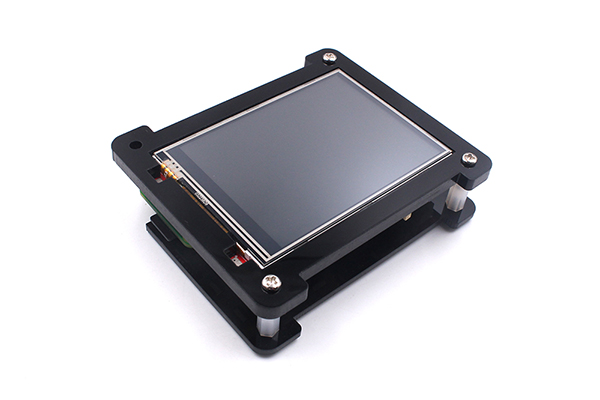
This platform based on Raspberry Pi Zero-W, it has an SPI 3.2" display with touch. The "SPI" means it does not use the Raspberry PI HDMI display, that you can also connect it to a normal PC display with HDMI, for dual-channel displaying, suitable for lite/mobile applications; There 2 pcs on-board MEMS MIC and speaker, for applications that need voice interface; There also A/D convertors and Mabee(Grove) interfaces for infinite applications, to make this platform a good choice to projects prototyping.


This platform based on Raspberry Pi Zero-W, it has an SPI 3.2" display with touch. The "SPI" means it does not use the Raspberry PI HDMI display, that you can also connect it to a normal PC display with HDMI, for dual-channel displaying, suitable for lite/mobile applications; There 2 pcs on-board MEMS MIC and speaker, for applications that need voice interface; There also A/D convertors and Mabee(Grove) interfaces for infinite applications, to make this platform a good choice to projects prototyping.
4. DHT11 Library
Raspberry Pi Zero communicates with DHT11 by executing the special library DHT11.py. How the DHT11.py to perform the communication? Let’s focus on the code:
First, the Pi Zero transmit the started signal to DHT11 module. Set the GPIO which the pin connected with the one-wire bus to output, and set the voltage level of the GPIO to high 50ms for preparation, then set to low 20ms for transmitting the start signal.
First, the Pi Zero transmit the started signal to DHT11 module. Set the GPIO which the pin connected with the one-wire bus to output, and set the voltage level of the GPIO to high 50ms for preparation, then set to low 20ms for transmitting the start signal.
        RPi.GPIO.setup(self.__pin, RPi.GPIO.OUT)

        # send initial high
        self.__send_and_sleep(RPi.GPIO.HIGH, 0.05)

        # pull down to low
        self.__send_and_sleep(RPi.GPIO.LOW, 0.02)
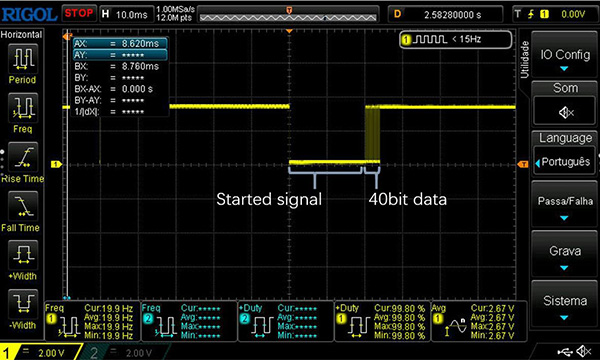
Next, Pi zero release the control permission of the GPIO that set the GPIO to input mode. After the DHT11 module received the start signal. The DHT11 module will set the bus status to low 83us and set it to High 87us for responding to the started signal. Then the DHT11 module would start to transmit the 40bits data one by one.
        # change to input using pull up
        RPi.GPIO.setup(self.__pin, RPi.GPIO.IN, RPi.GPIO.PUD_UP)

        # collect data into an array
        data = self.__collect_input()
As you see, the data collected include the Responsive signal, and it has to calculate second time.
        # parse lengths of all data pull up periods
        pull_up_lengths = self.__parse_data_pull_up_lengths(data)

        # if bit count mismatch, return error (4 byte data + 1 byte checksum)
        if len(pull_up_lengths) != 40:
            return DHT11Result(DHT11Result.ERR_MISSING_DATA, 0, 0)
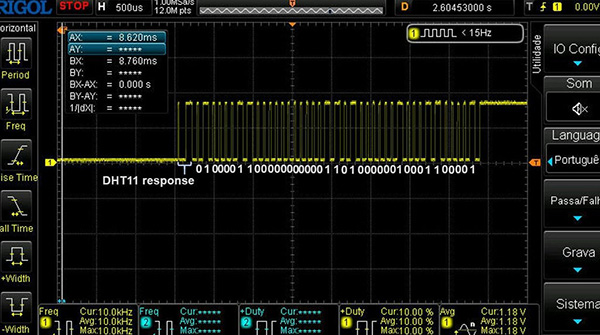
The 40bit data include the humidity data, temperature data, and checksum: the 1~8bit are the integer part of humidity, the 9~16bit are the decimal part of humidity, the 17~24bit are the integer part of temperature, the 25~32bit are the decimal part of temperature, the 33~40bit are the checksum part. Such as:
The 40bit data I got from the oscilloscope are 01000011 00000000 00011010 00000100 01100001. The humidity one is 01000011 00000000, which means 67.0% humidity. The temperature one is 00011010 00000100, which means 26.6°C.
Checksum: 01100001 = 01000011 + 00000000 + 00011010 + 00000100
If the checksum is not equal to the sum of others, the data is wrong.
# calculate bits from lengths of the pull up periods
        bits = self.__calculate_bits(pull_up_lengths)

        # we have the bits, calculate bytes
        the_bytes = self.__bits_to_bytes(bits)

        # calculate checksum and check
        checksum = self.__calculate_checksum(the_bytes)
        if the_bytes[4] != checksum:
            return DHT11Result(DHT11Result.ERR_CRC, 0, 0)

        # ok, we have valid data, return it
        return DHT11Result(DHT11Result.ERR_NO_ERROR, the_bytes[2], the_bytes[0])
5. Loading Code and Result
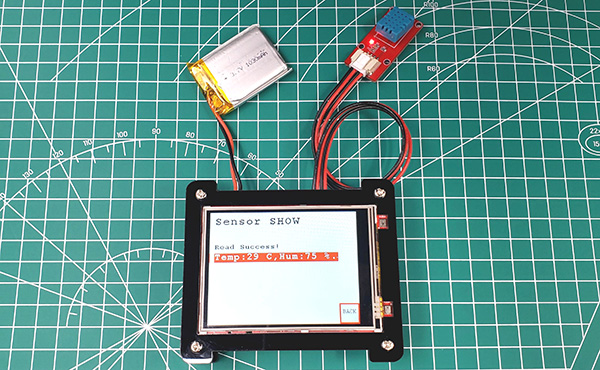
Connect the Pi Hat and the Mabee DH11 module, loading the code, you will see the result as the photo shows: the temperature is 29℃, and the humidity is 75%.
All code can be obtained from Github. Run the default code and operate it, it would get the DHT11 readings and display them on the LCD.
If you have further questions for this article about the Raspberry Pi basic usage with DH11 library, or need Turnkey PCBA service, please feel free to contact service@makerfabs.com.