
ESP8266 WiFi Shield Firmware Upgrade V1.0
We found a problem with our ESP8266 WiFi shield firmware upgrade: some firmware versions may not come true user's HTTP request function, here we will tell how to solve it.
Due to ESP8266 chip manufacturers to provide different firmware version, some firmware versions may not come ture user's HTTP request function, we found this problem in the test, so we put the latest version of firmware in the following file, and give users who need the firmware upgrade tutorial.
Version: V1.0
Author: Ricardo
Creation Time: 2022/9/5
1. Prepare Materials
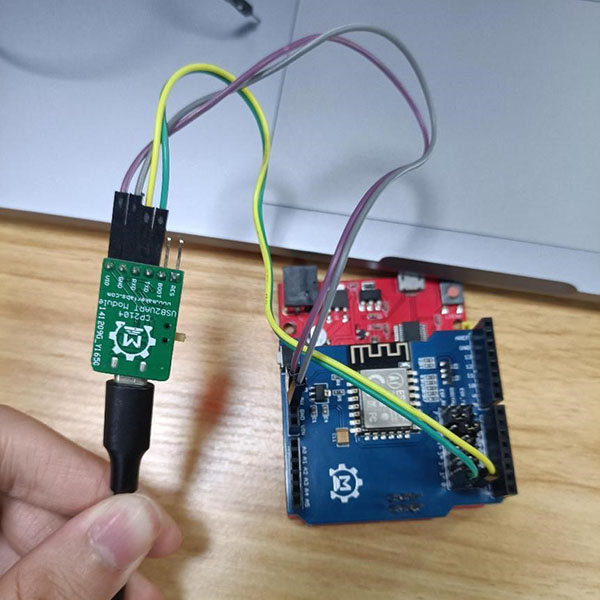
(1) WiFi shield module(2) USB2UART converter
(3) Downloard: flash_download_tool 3.8.5
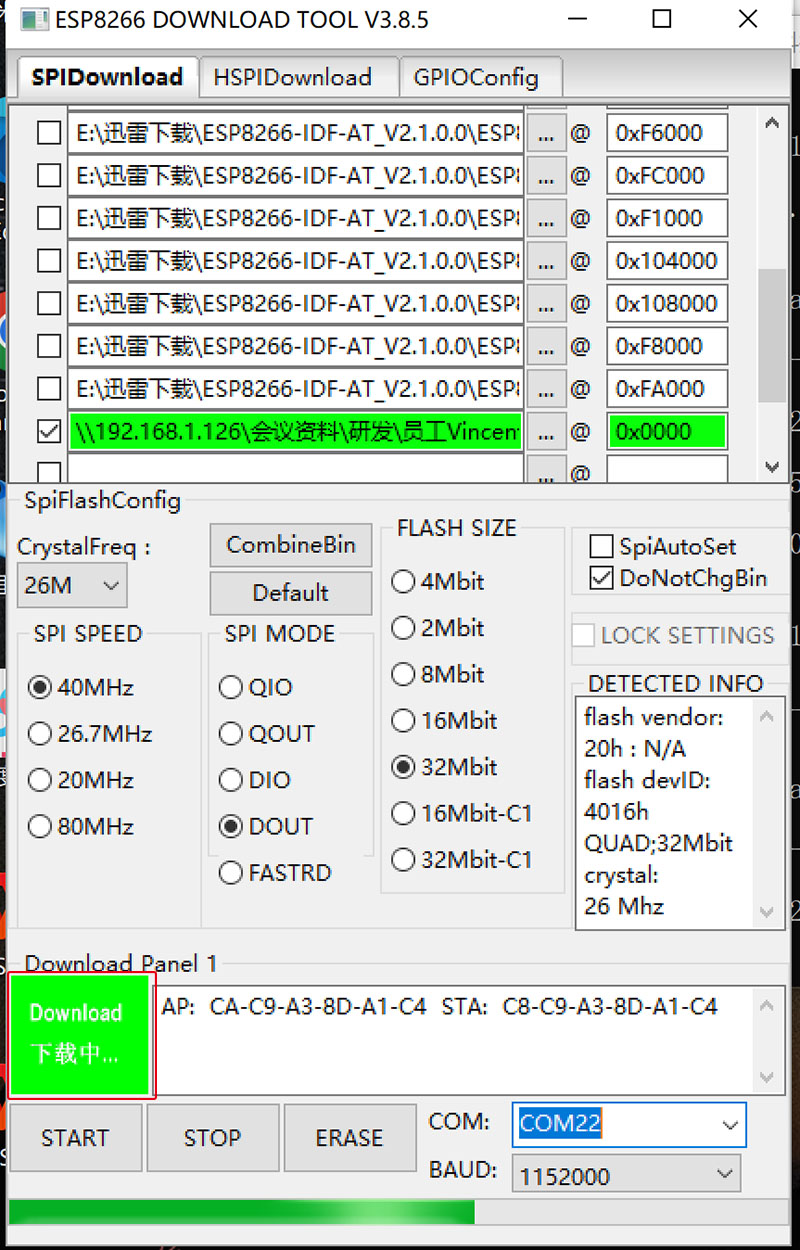
(4) Upgrade program (remember the file path after unpacking it, and then burn it in flash_download_tool)
2. Upgrade Method
Using the USB2UART Converter, power supply in 5V, and connect as follows:| Converter | WiFi Shield |
| VCC | 5V |
| GND | GND |
| RXD | ESP_TX |
| TXD | ESP_RX |
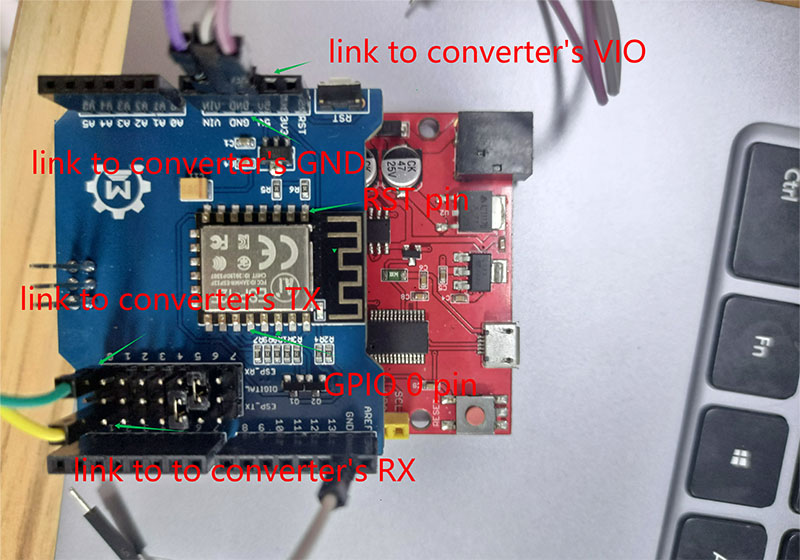
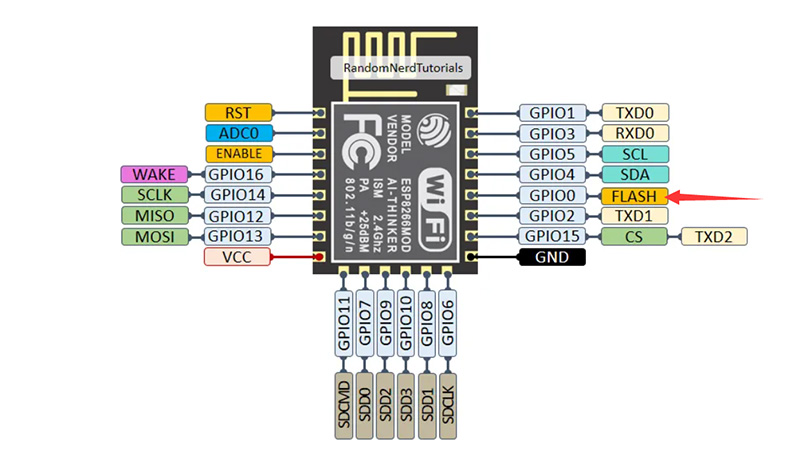
The pin distribution of ESP12F is shown in the figure:
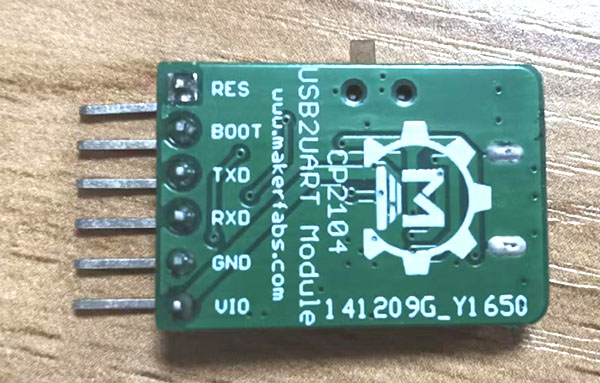
USB2UART Converter is shown below. If you not have the same Converter, you only need a USB2UART Converter have to four pin ports: VCC,GND,TX,RX
2. Use the prepared package, decompress it and open it:
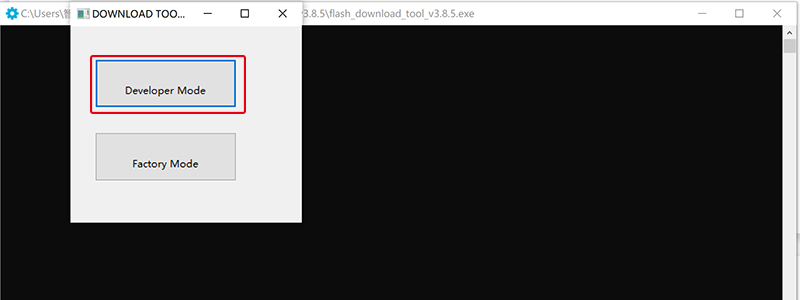
Select “Developer Mode” and the following screen appears:
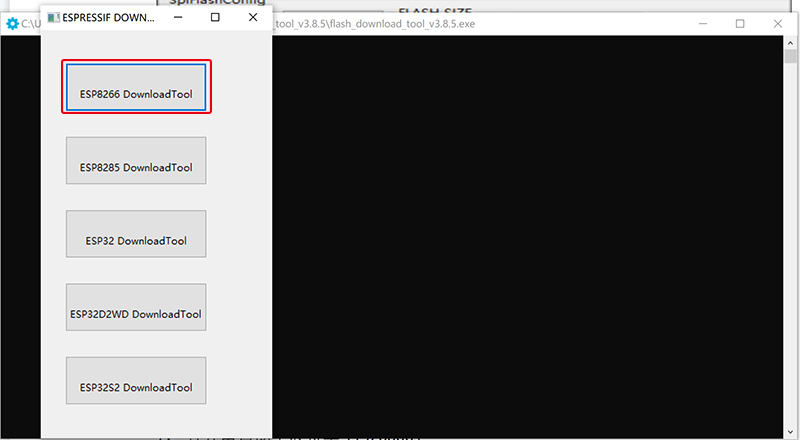
Select “ESP8266” and add in firmware upgrade program as follows:

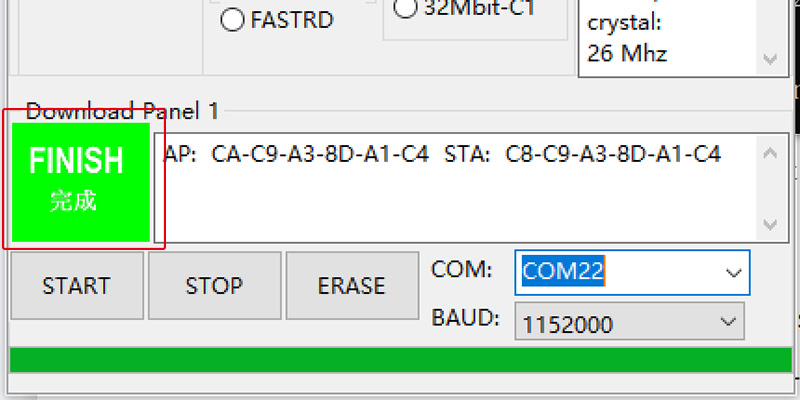
3. Using the ground wire to keep GPIO0 pin in a low level state, then touch the RST pin through the ground wire, let it into an access to electricity state, into download mode.when you see the screen “Download”, it’s evidence that program is upgrading.
3. Warnings
● Click the “Start” button. If there is no response, repeat the preceding steps● It is recommended to use the baud rate to 1152000, and the download will be faster in the case of firmware upgrade
● Wait for the download to complete
● If you get stuck halfway through the burning process, or the correct version content is not displayed after successful burning, please check whether the power supply of your USB2UART Converter is 5V instead of 3.3V. This factor is very important, it can determine the burning Whether the recording was successful
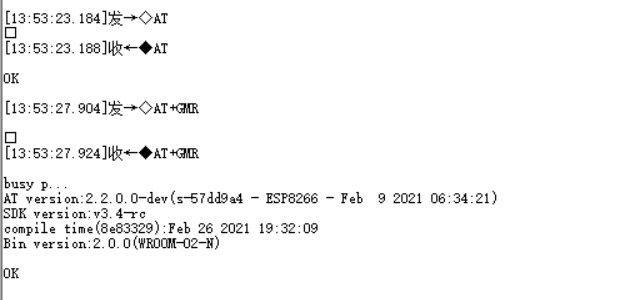
● Open the serial port assistant and set the baud rate to 115200bps
● Send AT+GMR through the send window, the version should be as follows:
So you have successfully upgraded your WiFi shield firmware version now.
Modifying the Baud Rate
After we upgrade the ESP8266 WiFi Shield, its firmware communicates with the defaulted baud rate of 115200bps. If we communicate with Arduino UNO through serial ports, changing the baud rate to 9600bps will make the communication more successful and prevent garbled characters.You can change the baud rate of ESP12F to 9600 using the code “AT+UART_DEF=9600,8,1,0,0”.

If you have further questions about ESP8266 WiFi Shield firmware upgrade, you can check this Wiki of ESP8266 WiFi Shield, or contact service@makerfabs.com.
Related Blogs
- [2023-06-26] Exclusive Giveaway Event - Win Exciting Prizes: $200 Coupon or Raspberry Pi 4 Computer 8GB!
- [2022-12-07] Cautions in Using ESP32 ADC - Makerfabs
- [2022-07-15] Production Errors of Lora Soil Moisture Sensors
- [2022-05-20] How to Make an Ultrasonic Levitation Device
- [2022-01-14] 2022 Spring Festival Holiday Notice